DEKOPANELS
Flexible reeded panels mini
Flexible reeded panels mini
Couldn't load pickup availability
Flexible Reeded Mini Panels offer a refined version of the classic reeded design with smaller and more closely spaced ridges. This subtle texture adds a sophisticated and decorative detail to interiors while maintaining a clean and elegant appearance.
Constructed with real wood veneer or melamine surfaces bonded to a durable MDF core, these panels are designed to combine flexibility, strength, and visual appeal. Their flexible backing allows them to follow curved walls and architectural surfaces, making them ideal for custom interior applications.
Colors Available
Oak (Natural Real Wood Veneer)
Walnut (Natural Real Wood Veneer)
Black (Solid Melamine)
White (Solid Melamine)
Materials
Surface: Real wood veneer or melamine
Core: MDF
Backing: Water-resistant fabric
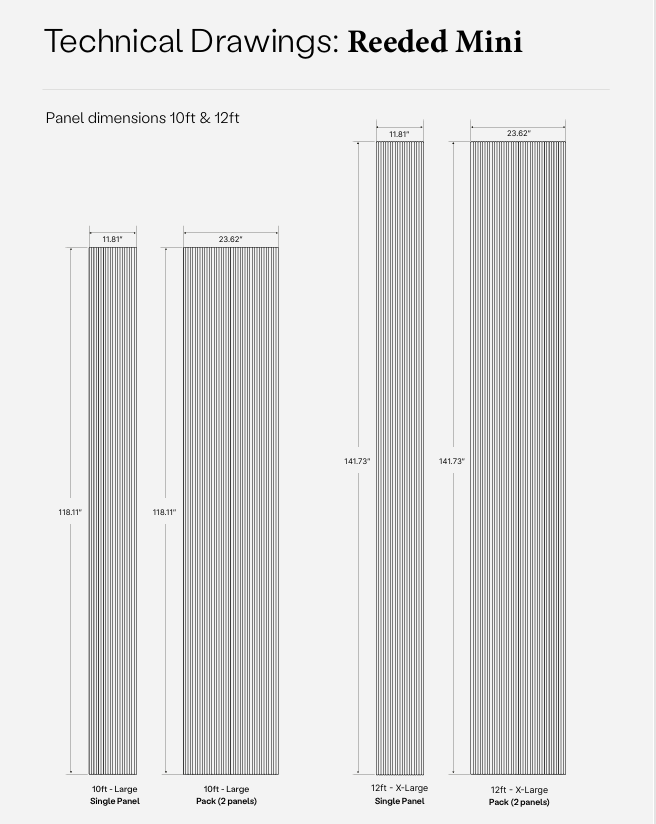
Panel Dimensions
Thickness: 0.51 in
Widths
11.81 in (single panel)
23.62 in (pack of 2 panels)
Heights
47.24 in (4 ft)
94.49 in (8 ft)
118.11 in (10 ft)
141.73 in (12 ft)
Key Features
Fine mini-reeded texture for subtle design detail
Flexible construction for curved surfaces
Lightweight and easy to customize
Ideal for decorative walls, cabinetry, and furniture
Simple installation and low maintenance
Pickup & Delivery
- Local pick-up available for all orders
- For shipping or delivery requests, please contact: support@dekopanels.com
- Professional installation available. Contact us for details.
- Samples available upon request.
*Dimensions are approximate. Minor variations between panels may occur.
INSTALLATION GUIDE
Step 1 – Measure the Wall
Measure the height and width to determine panel quantity and required cuts.
Step 2 – Mark Cutting Lines
Mark dimensions using a straight edge. Apply tape along the cut line to protect the veneer.
Step 3 – Cut the Panel
Use a fine-tooth saw and cut slowly for a clean edge.
Step 4 – Smooth Edges
Lightly sand edges for a precise fit and clean finish.
Step 5 – Position the Panel
Place against the wall and ensure proper alignment and level.
Step 6 – Secure the Panel
Install using heavy duty adhesive. For added security, finish brad nails can also be used.
Step 7 – Repeat
Continue installation, aligning panels carefully for a seamless look.
For a refined, seamless look, we recommend using color-matched silicone or wood putty to fill panel joints.
Share